Learning is experience. Everything else is just information. -Einstein

Category: Free Inquiry

‘Soup’er Delicious

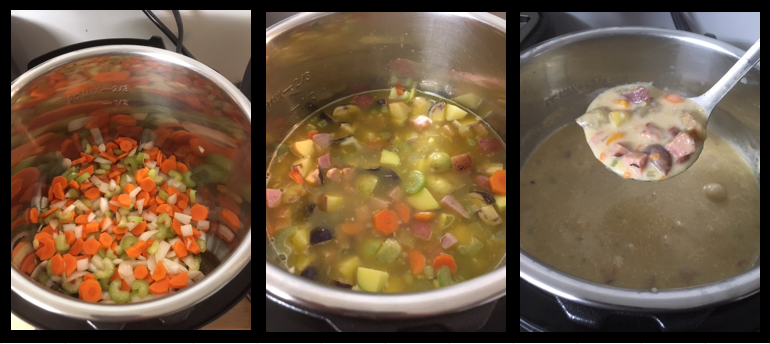
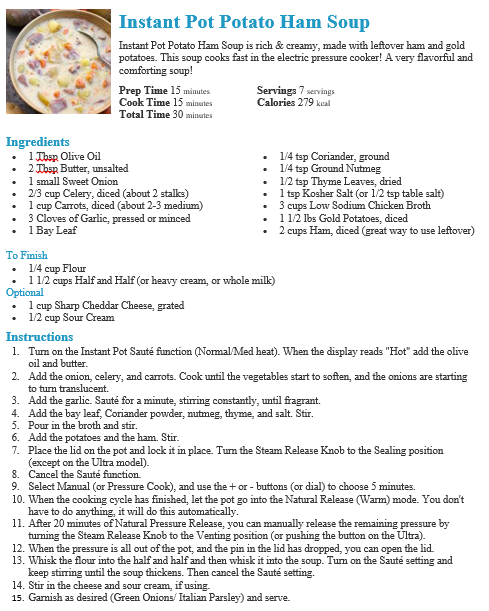
This week, I embraced the idea of comfort food in a wonderful way. I used some of the leftover ham from last week to make a tasty potato ham soup (which had a bunch of veggies in it , so I didn’t even have to feel bad about it). This recipe called for multiple cooking modes and had me flipping between the sauté and pressure cook functions like a pro.

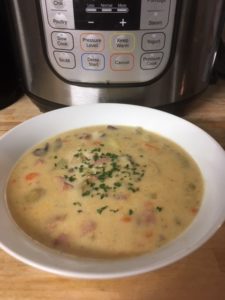
The satisfaction of making this delicious soup is pretty representative of my experience throughout this entire inquiry project. I have always enjoyed cooking and baking as a creative outlet and this project has forced me to make time for it during an exceptionally busy, and often overwhelming, few months. In addition to serving as a much-needed opportunity to practice some self-care, I’ve also managed to learn how to use a new tool without blowing a hole in my kitchen ceiling (that’s all I dared hope for). This has been a truly enjoyable experience.

Ham it up

This week I ‘cooked’ a ham. Admittedly, this is probably one of the simplest things I could do seeing as how the ham was already cooked when I brought it home form the grocery store and I just needed to warm it up. While this task didn’t exactly challenge my technical skills, it did pave the way the way for my next recipe (ham and potato soup) and I actually managed to learn quite a few useful tricks.

  • First, if you want to avoid dried out ham, the Instant Pot is good way to go.
  • It is important to seal the ham well in foil or parchment paper to keep the flavour and moisture in and to prevent a burn warning (I have not yet encountered a burn warning, but it sounds scary, so I would like to keep it that way).
  • Most recipes I came across also included a honey or brown sugar glaze, but I plan to use the leftovers in savoury soup, so I skipped this step.
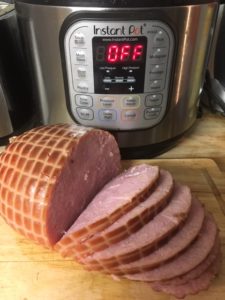
  • How long do you cook a ham in the Instant Pot?: The goal with pre-cooked hams is to simply warm them through without drying them out, so the basic rule of thumb is 2 minutes per pound on high pressure plus 10 minutes to the total time to account for the foil.

Unsurprisingly, this turned out to be delicious because, well, it’s ham.

Unrelated to this recipe, I learned another trick this week. I am partly amazed by its simplicity, partly ashamed that I didn’t figure it out sooner, but mostly just happy to know it, so I thought I would share:


Pad Thai, Oh My!

This week, I decided that progress in my learning would take the form of the fabled ‘one pot dinner’.

When I have heard people in the past talking about how much they love their Instant Pots, this is usually what they were referring to. I get it. One pot meals are usually pretty simple, delicious, and require minimal clean-up. These are the same reasons I already love my slow cooker. Apparently, though, people are willing to embrace the risks of a high-pressure environment in order to add ‘super quick’ to that list of attributes.

I have enjoyed a series of successes thus far, so I thought it was time to try a recipe with a slightly longer list of ingredients and a couple extra steps. When I started this project, a very wise man told me I should consider making one of his favourite Instant Pot meals, Pad Thai. I’m glad he did because that is what I made this week and it was absolutely delightful. This one is definitely going into the regular rotation. Here’s the recipe I used:

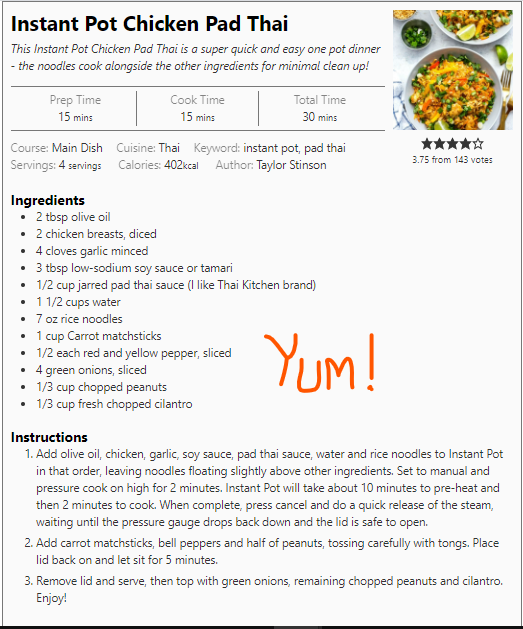
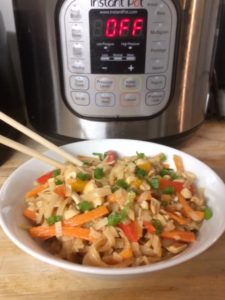
In addition to becoming more comfortable with my pressure cooker, the ingredients list for this recipe also provided me with learning opportunities. I have enjoyed Pad Thai at some of the lovely restaurants around downtown Victoria, but I had never actually purchased or prepared rice noodles before. This is just one more thing I can add to my repertoire.

There are still a lot of buttons on this machine that I haven’t touched yet. Let’s see where next week takes us.

‘Cooped’ up with Pulled Chicken

This week, I made BBQ pulled chicken and holy smokes was it delicious. Here’s a riveting screencast of me finding the recipe:

I followed the recipe pretty closely, but made a few alterations. First, I only had two chicken breasts (those things are expensive), so I roughly halved the recipe. Second, the original instructions said to use the sauté button to cook off the extra liquid after 10 minutes of natural pressure release. Perhaps because my batch was a bit smaller, there actually wasn’t any extra liquid when I open the lid. I’ll have to make sure my next recipe includes that button, so I can add it to my list of accomplishments. I shredded the tender chicken with a couple of forks, sauced it up, and threw it onto a 
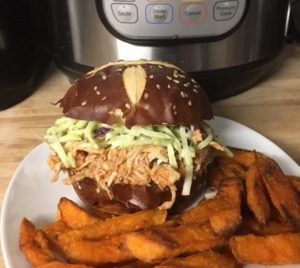
toasted pretzel bun with some coleslaw.

Next time, though (and there definitely will be a next time) I will make a much larger batch because there are so many tasty things to do with this. Serving it over rice, working it into a salad, or putting it into little corn tortilla tacos are just a few that come to mind. Yummy!

Right Place, Rice Time

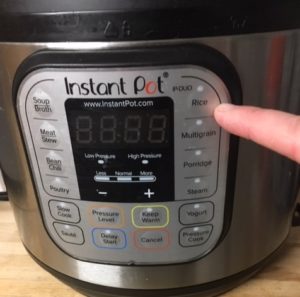
This week, I learned to use a new button. I decided that the next step in my (not so) daring gastronomic journey would be to try using the rice cooker function on my Instant Pot. Again, this is just a side dish and it is something that I have made countless times before by other means, but I’m still in confidence-building mode.

Here are some important things I learned:

1. The Instant Pot’s ‘Rice’ button is best used for white rice, as it is specifically calibrated to weigh white rice and water and cook the rice accordingly (other types of rice can still be cooked with the pressure function, but require you to manually input cooking times).

2. Rinsing the rice before cooking is a good idea to get rid of starch that can make the rice sticky and to replace the small amount of moisture lost in evaporation during the cooking process.

3. Use the right ratio of water to rice. For most types of rice, this is 1:1.

4. Literally, just push the ‘Rice’ button and let the magic machine figure out the rest.

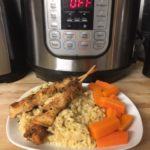
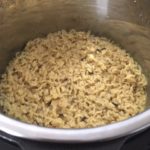
The cook time for this was about 5 minutes. After letting the pressure naturally release for 10 minutes, I opened the lid to find yet another lovely pot of scrumptious sustenance. Two for two!


Sweet (potato) Success!

For my first foray into the world of pressurized cooking, I decided to start with a small side dish instead of jumping right into an entire one pot meal. There will be plenty of time to get adventurous later.
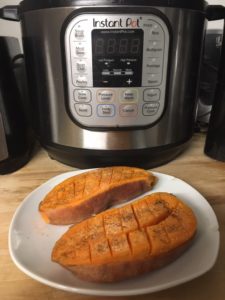
This week’s task was simply to cook a sweet potato. Not exactly complex, but I learned a lot about using the Instant Pot and I didn’t blow up my kitchen. As Martha would say, “this is a good thing.”

I love sweet potatoes and I have made them many times before in my oven. Depending on whether I am roasting pieces or baking the whole thing, it usually takes about 35-50 minutes. So, when I saw that the full cook time for a sweet potato (halved lengthwise) in the Instant Pot was only 8 minutes, I thought, “my goodness, what is this fantastical wizardry?”

In actual practice, however, it took much longer. One thing I learned was that just because the cook time in the recipe is 8 minutes, doesn’t mean that it’s going to be ready in 8 minutes.

Once I had put some water in the bottom of the pot, placed the potato halves on the steaming rack, and sealed that sucker in there tight, it took about 10 minutes for enough pressure to build inside the pot to the point where the cooking timer actually started counting down. Add to that the time it took for the pressure to release and the total was closer to 25 minutes.

Timing issues aside, this experience was a resounding success. Once I double checked that the pressure had properly released (who are we kidding? I at least quadruple checked), I pulled off the lid and found tender, creamy, perfectly cooked sweet potatoes waiting inside. Huzzah!

I don’t know if it’s all the Vitamin A talking, but I’m feeling pretty good right about now.


Let’s get cookin’

There have been many hobbies which have caught my eye over the years only to be left unexplored due to a lack of free time. I considered using this free inquiry project as an opportunity to delve into one of them. Maybe it was time, at last, to pick up an instrument, any instrument, and learn how to create my own music. Perhaps I could finally make manifest that miniature Christmas village I have intended to craft ever since I found out how crazy expensive those picturesque little buildings are to purchase. Forty dollars for a hot chocolate stand? Give me a break.

But alas, I had underestimated how much time this program would demand, which is pretty much all of it. I don’t have time for hobbies, I don’t even time to cook a decent meal. I feel like it’s been weeks since I ate something that didn’t come out of the toaster or microwave. I’m pretty sure I would be developing scurvy by now if it weren’t for my daily homemade smoothies.

That’s when I heard a distant call coming from my pantry. It was the Instant Pot I received for my last birthday, but haven’t used yet because it’s an electric pressure cooker and pressure cookers are scary. Yes, I’m intimidated by new technology, which really bodes well for my prospects in this class, but add to that the fact that it has a threatening array of a hundred buttons on the front of it and I tapped out before the fight even started. Call me crazy, but I like it when cooking my dinner doesn’t have the possibility of ending in a large explosion.

Am I being irrational? Yes. Is it time to get over it and learn how to use this thing? Also, yes. Therefore, my goal for the free inquiry project is to become a proficient user of my potentially perilous Instant Pot.

The first step in conquering any foe is to ‘know thy enemy’. So, I have begun this adventure by starting where most people only end up as a very last resort, reading the instructions.

Next week, we get cooking.

© 2024 Bronson’s Blog

Theme by Anders NorenUp ↑